Tracks and status signals
Display and export tracks
You can show multiple tracks for multiple Operators/Vehicles at the same time on the map. First you select the desired Operators/Vehicles by checking the Track box next to the name in the Vehicle list in the Vehicle panel. This will populate the Tracks panel with the tracks of the selected Operators/Vehicles.
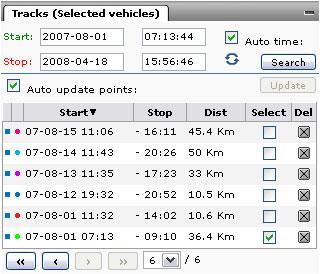
The default sort order is with the newest track first, you can sort the lists in another order by clicking the column headers. You can limit the tracks you wish to show by narrowing the start and stop time stamps. By doing so you will only display Tracks that have Track points inside the selected time period.
To view a Track click on the check-box in the Select column in the Track list. This will open then Track points panel and fill the Track points list with all the Track points from the selected Track.
You can also delete tracks in this list by clicking the icon to the right of a track.
If you have selected the “Auto update points” option all you changes in the Tracks panel will instantly take effect in the Track Points panel. If you are working with many tracks and Track Points at the same time you can disable this function by clearing the check-box. This will Speed up load time. If you have done this then use then Update-button to load the Track Points into the Track Points panel.
Drawing Tracks
When you select a track in the Tracks list it is opened the Track Points panel, where you see the individual positions in the track. Clicking on the Draw Tracks button will draw the chosen tracks on the map in different colors for each track. There is also a button here for clearing all tracks from the map.
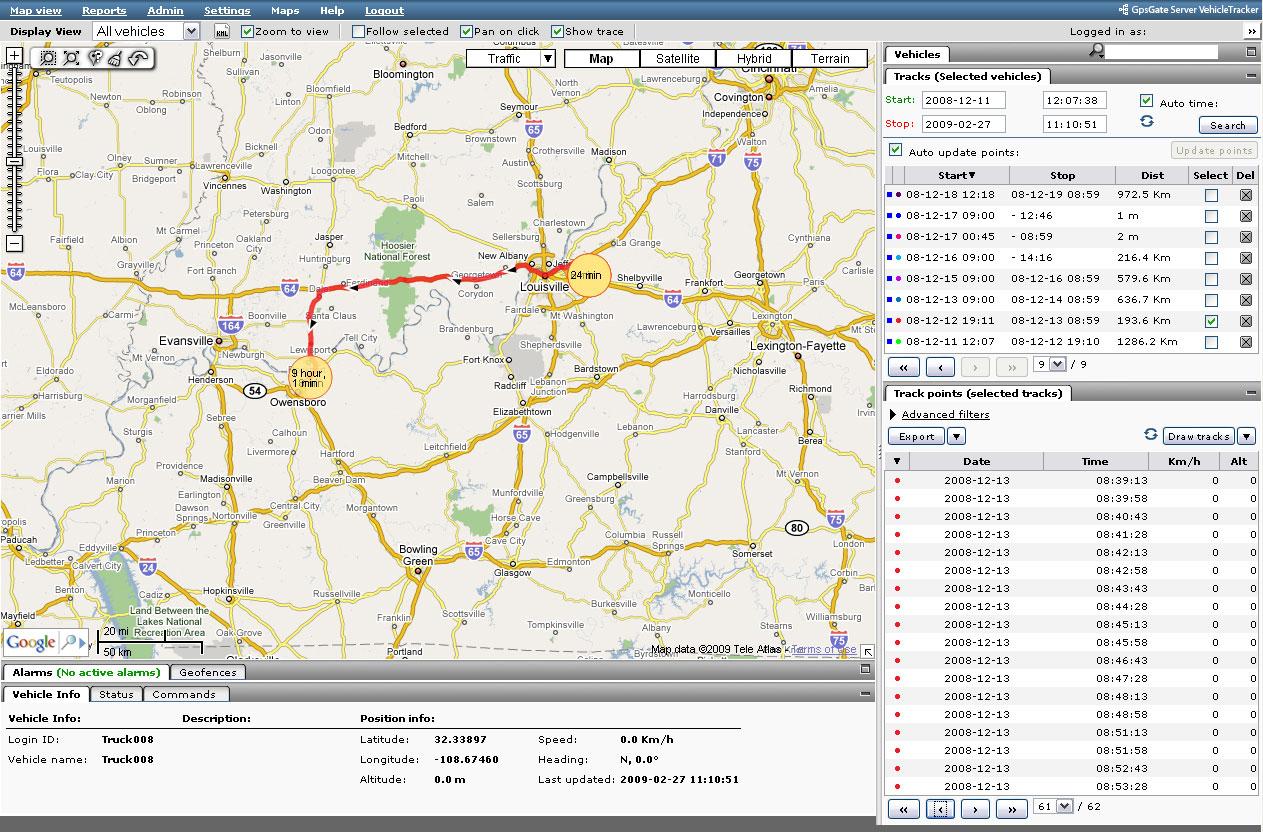
You can select an individual track point in a track either by clicking on it on the map, or by clicking on it in the Track point list. You remove the tracks drawn on the map by clicking the icon next to the Draw Tracks-button.
Tracks settings
Next to the “Draw tracks”-button you have a split-button menu (facing down arrow). Clicking it exposes a menu with different options for track drawing. Check the check-box next to the specific option to enable it for track drawing.
You have the following options:
- Show polyline Select this option to connect all the track points in a track with a solid line.
- Show points Select this option to show markers with direction arrows on the track points. To show a bread crumb trail you should enable this option without the polyline option above.
- Show Fatpoints Select this option to show “Fatpoints” where the vehicle has been idle. A Fatpoint also includes information on the length of the stop.
- Zoom to fit Select this option to zoom in on the selected tracks when drawing and re-drawing them. You should un-check this option if you have zoomed in on a part of the selected tracks and you wish to re-draw them without changing the zoom level and position of the map.
Advanced filters
You can narrow down your search further based on different search criteria. This is done by expanding the Advanced filters options found on top of the Track points panel.
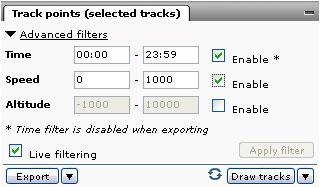
You have the options time, speed and altitude. By default the search options are disabled. You enable them by checking the check-box to the right of each field.
Below the search fields you have a check-box named “Live Filtering”. When this option is enabled the Track Point list below will update directly when you change your search criteria. If you are working on large amounts of data you have the option to disable the Live Filtering by clearing the check-box and using the Apply Filter button to the right.
Exporting track data
There are two ways to export tracks. The Export-window that you open in the “Reports”-menu, and the Export button that you find in the Track points panel.
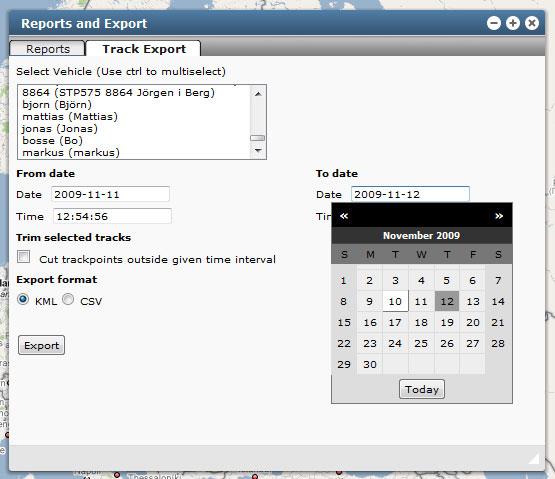
Using the Export Window
The Export window allows you to choose one or more vehicles that you wish to export Tracks for, the start and stop time stamps, the option to “trim” any Tracks that cross a start/stop time stamp, and whether it should be exported as CSV (Comma Separated Values) for use in, for example, Excel or Access, or in KML (Keyhole Markup Language) format for Google Earth.
You can select the Status Message fields to include in the export in the drop down list at the bottom of the Track Export window.
Note that all time stamps are exported in UTC (Universal Time Coordinated) format.
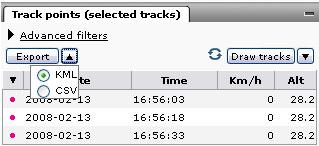
Exporting from the Map View
Exporting from the map view page is done by clicking on the “Export” -button in the Track points list. You export the tracks that are listed in the Track points list, and shown on the map if you have drawn them. All time stamps are exported in UTC (Universal Time Coordinated) format.
With the split-button menu next to the “Export” button you can select either KML or CSV as the export format.
Note: The columns currently displayed in the Track points list are exported. Use the “Select Columns” icon to the right of the Track points list header to select the Status Massage fields you want to include in the export.
Display status signals
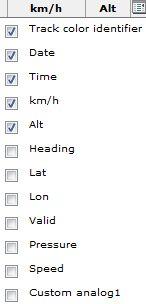 The “Select Columns” icon to the right of the Track points list header lets you choose what to display in the Track points list. The drop-down is populated with all the status message variables you have in the selected tracks, select the fields you want to show. The following fields are default:
- Track color identifier – identifies the vehicle in the track list
- Date – date
- Time – time stamp
- km/h – speed (shown in the selected unit)
- Alt – altitude
- Heading – heading
- Lat – latitude
- Lon – longitude
- Valid – validity of the position update