Geofences
The “Geofence” tab is divided in two modes, Administrator and Operator mode. As an Operator you can only view existing Geofences created by an Administrator.
Operator mode
Click on the “Geofence” tab and select the Geofence Tag you would like to view in the drop-down menu. You will get a list of all included Geofences. Click on a Geofence to pan the map to the location of the selected geofence.Administrator mode
As an Administrator you have the ability to create and edit Geofences. You also have the ability to group Geofences using Geofence Tags.Create a Geofence
To create a new Geofence click the “Geofence mode” radio-button next to the drop-down menu is selected. Then select “-- New circle--” or “-- New polygon--” in the drop-down menu.
Type in the desired name of the Geofence in the “Geofence name” text box. Use names for your geofences that describe the location (e.g. New York, Acme ware house, etc.).
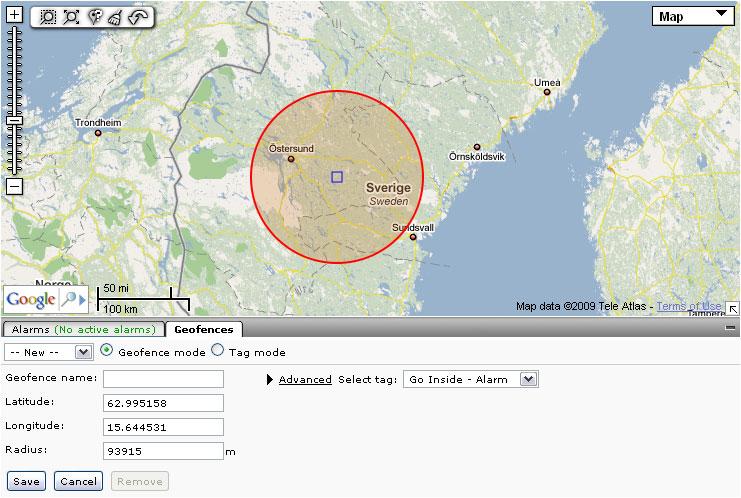
When choosing a circle geofence, the red circle that appears on the map is the Geofence boundary. Click on the circle center and drag it to the right place on the map. You can click and drag on the circle border to increase or decrease the Geofence radius.
Note: You can also place and resize the Geofence using the input fields in the Geofence form.
When choosing a polygon geofence, left click on the map to start drawing the polygon. Left click on the map for each new point of the polygon that you wish to create. Right click to create the final point and to close the polygon.
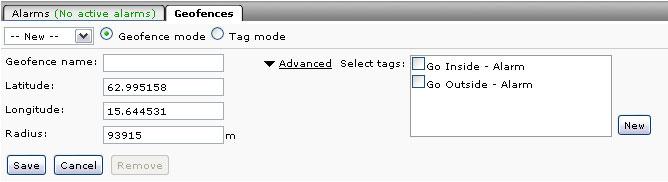
You connect a single Geofence to a group of Geofences by adding a Geofence Tag. There are two predefined Geofence Tags that trigger alarms:
- Go inside – Alarm: Triggers an alarm when a vehicle enters the Geofence area
- Go outside – Alarm: Triggers an alarm when a vehicle leaves the Geofence area
Select the one you would like to use in the drop-down menu named “Select Tag”. Save your Geofence when you are done. The Geofence will now trigger alarms for all Vehicles in your application.
Advanced: The advanced-link lets you add new Geofence Tags. You can also use it to add your Geofence to multiple Geofence Tags. Custom Geofence Tags can be used to create more advanced Event Rules (See the chapter about Event Rules for more information).
Geofence editing
You edit an existing Geofences by selecting the Geofence in the drop down menu. You can then rename, move, resize or remove the Geofence just as you do when creating one.
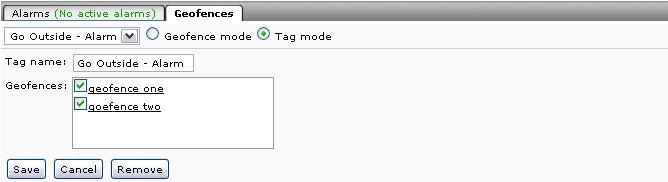
You can also Edit Geofence Tags by selecting the “Tag mode” radio-button next to the top drop-down menu. All the Geofence Tags will then be selectable in the drop down menu. Here you can select and de-select Geofences within each Geofence Tag. Click Save to apply your changes.
Group multiple areas to one Geofence
*** to be done ***